To Setup Display Settings of Schedule
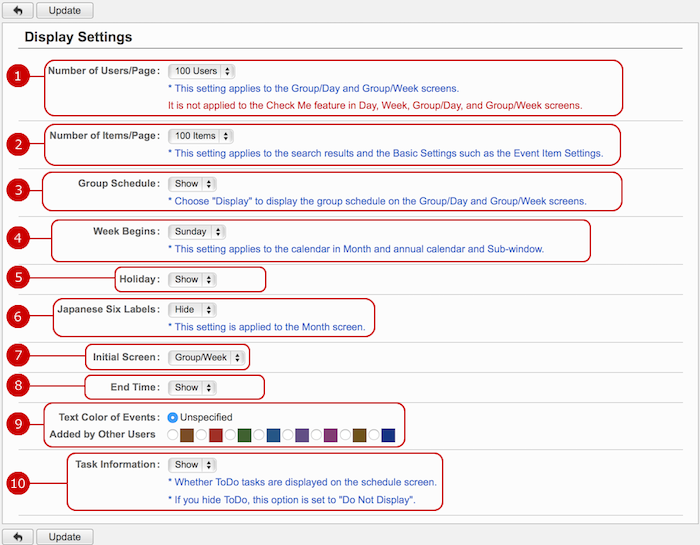
When you press the link of Display Settings in Settings menu, Display Settings screen is displayed.
-
Choose how many users are displayed per page for Group/Day and Group/Week screen.
-
Choose how many items are displayed per page for such as search results, the list of event items screen.
-
Choose whether to display group schedule on Group/Day and Group/Week screen.
-
Choose the first day of week of the monthly calendar.
-
Choose the first day of week of the monthly calendar.
Names of holidays that a system administrator has setup.
-
Choose whether to display Japanese six labels.
* If the system administrator sets to not display Japanese six labels, this option is not displayed.
-
Choose which screen is displayed when Schedule application is started.
-
Choose whether to display end time of events.
-
Choose which color is used to display events added by other users.
-
Choose whether to display ToDo tasks.
* If you hide ToDo, this option is set to "Do Not Display".
When the setup is complete, press "Update" button to save the data.
To Setup Access Rights
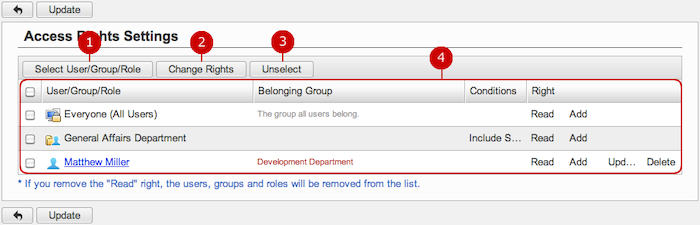
When you press the link of Access Rights Settings in Settings menu, Access Rights Settings screen is displayed.
Grant the right to read, add, update, delete events to other users.
-
Select users, groups, and/or roles that grant access rights.
When you press "Select User/Group/Role" button, the user, group, role selection window is displayed.
Select users, groups, and/or roles that grant access rights.
(Please refer to the explanation of the user/group/role selection in the user's manual for more details.)
-
Grant access rights to users, groups, or roles you selected.
When you choose one from User/Group/Role and press "Change Rights" button, Change Rights window is displayed.
-
Unselect users, groups or roles.
-
The list of users/groups/roles to which the user grant access rights is displayed.
User/Group/Role, Belonging Group, Conditions, Right fields are displayed.
For users, belonging groups are displayed.
For groups, if granting rights to subordinates, "Include Subordinates" is displayed in Condition.
When the setup is complete, press "Update" button to save the data.
- About Change Rights
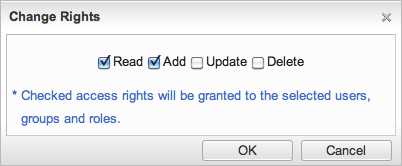
- There are four types of rights: "Read", "Add", "Update", and "Delete".
-
Read Right
Selected users/groups/roles can view your events.
-
Add Right
Selected users/groups/roles can add your events.
-
Update Right
Selected users/groups/roles can edit your events.
-
Delete Right
Selected users/groups/roles can delete your events.
* If "Read" right is not set, you cannot set "Add", "Edit", and "Delete" right. If you remove "Read" right, the user/group/role is removed automatically from the list.
Click "OK" button to complete the settings.
To Setup Overlapped Events Settings
When you press the link of Basic Settings > Overlapped Events Settings in Settings menu, Overlapped Events Settings screen is displayed.

-
Choose whether to allow overlapped events.
When the setup is complete, press "Update" button to save the data.
To Setup Delete Events Notification Settings
When you press the link of Basic Settings > Delete Events Notification Settings in Settings menu, Delete Events Notification Settings screen is displayed.

-
Choose whether to send a notification when deleting events.
When the setup is complete, press "Update" button to save the data.
To Setup Event Items
When you press the link of Basic Settings > Event Item Settings in Settings menu, the list of event items screen is displayed.
You can add, edit, and delete event items which can be used for event entry.
Event items can have their color which applies to events where the event item is selected in.
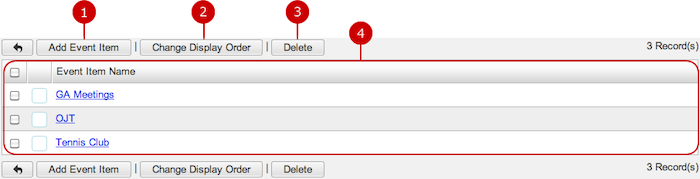
To Add Event Item
When you press "Add Event Item" button, Add Event Item screen is displayed.
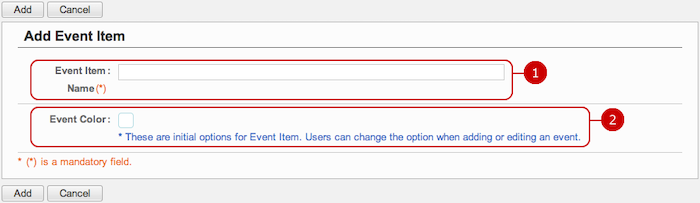
When all done, click "Create" and save the data.
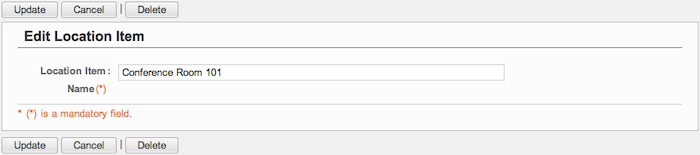
To Edit Event Item
When you press a link of the event item name, Edit Event Item screen is displayed.
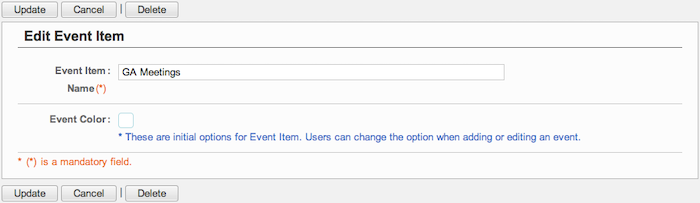
When changes are complete, press "Update" button to save the data.
To Delete Event Item
When you press "Delete" button on Recipient Whitelist Settings screen or Update Recipient screen, a confirmation window appears.
When you press "Yes" button, the event items are deleted. The deleted items cannot be recovered. Please take note.
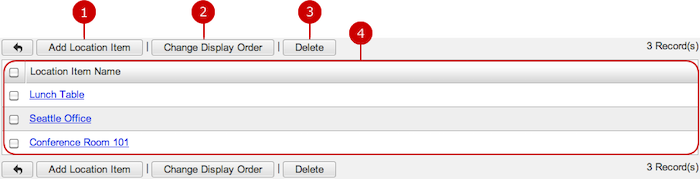
To Setup Location Items
When you press the link of Basic Settings > Location Item Settings in Settings menu, the list of location items screen is displayed.
You can add, edit, and delete location items which can be used for event entry.
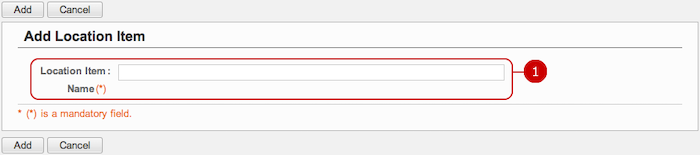
To Add Location Item
When you press "Add Location Item" button, Add Location Item screen is displayed.
-
Enter a location item name.
When all done, click "Create" and save the data.
To Edit Location Item
When you press a link of the location item name, Edit Location Item screen is displayed.
When changes are complete, press "Update" button to save the data.
To Delete Location Item
When you press "Delete" button on Recipient Whitelist Settings screen or Update Recipient screen, a confirmation window appears.
When you press "Yes" button, the location items are deleted. The deleted items cannot be recovered. Please take note.
To Setup Display Group Settings
When you press the link of Basic Settings > Display Group Settings in Settings menu, Display Group Settings screen is displayed.
Groups and private groups you selected are displayed in "Display Group" tab of the group selection windows which is used by Schedule application.
In addition, in Group/Day and Group/Week screen, the selection list of groups and private groups set by the display group settings instead of the group selection button is displayed.
* Display group settings you have setup are used in Facility Reservation.
-
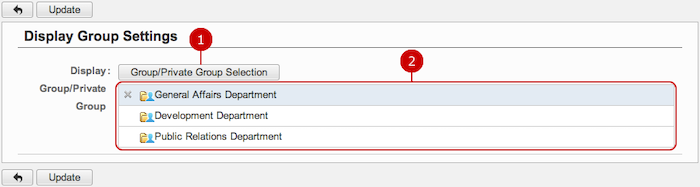
Select groups and/or private groups you want to set as Display Group.
When you press "Group/Private Group Selection", the group/private group selection window is displayed.
(Please refer to the explanation of the user/group/role selection in the user's manual for the user/private group selection window.)
-
The list of groups and private groups is displayed.
If you want to remove a group, press "X" button which appears when you hover the mouse pointer over a group.
When the setup is complete, press "Update" button to save the data.
To Setup Reminder Settings
When you press the link of Basic Settings > Reminder Settings in Settings menu, Reminder Settings screen is displayed.
You can setup notification email of events.
* Email messages are sent to the email addresses that you checked in Profile screen.
-
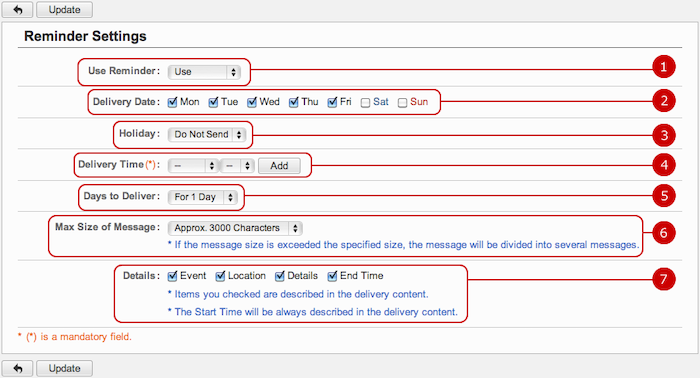
Choose whether to use reminder function.
-
Choose day of week to send a reminder.
-
Choose whether to send a reminder on holiday.
-
Set when you want to send a reminder. You can set multiple times.
-
Choose period of events included in a reminder.
-
Choose maximum characters per message.
-
Select which fields are described in a reminder.
When the setup is complete, press "Update" button to save the data.
Copyright (C) 2012-2016 NEOJAPAN Inc. All Rights Reserved.
