To See List of Notes (Main Screen)
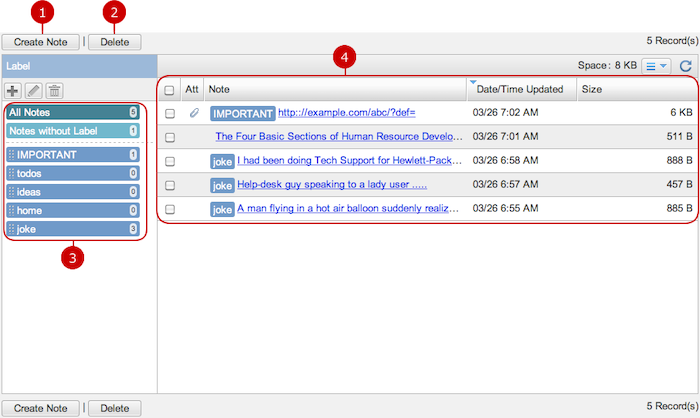
This screen shows the list of notes.
You can add, edit, delete, and even label your notes.
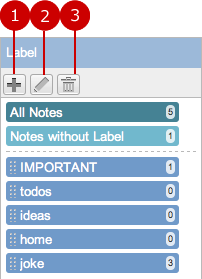
-
Create Note creates a note.
-
Delete deletes notes.
This button deletes notes selected in the list. You can select one or more notes at the same time.
-
Labels classifies notes. Click one of them to retrieve notes connected to it.
-
All Notes finds all notes you created.
-
Notes without Label finds non-labeled notes including new notes.
-
The other labels added by you find notes connected to each label.
You can add, edit, and delete labels here. (For more information, see To Manage Labels.)
-
This is the list of notes.
First few letters of a note show up in the list and they help you to know what the note is, without seeing the details.
An icon appears in Att column if a note has an attachment; Size column shows size of each note including attachments.
If a note has a label, it is placed at the beginning of the note's text. (You can remove the label by clicking it.)
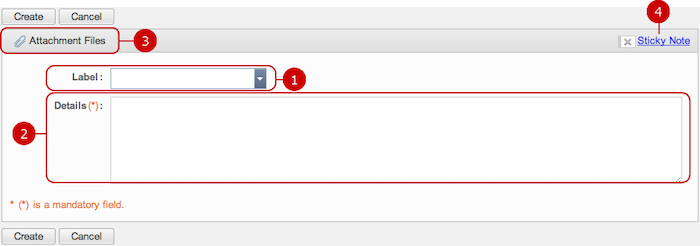
To Create a Note
Click "Create Note" and go to Create Note screen.
-
Add a label to classify the note.
You can select any of saved labels on the list shown by clicking the white "▼" mark, or add a new one by typing in the box.
-
Enter the details of the note. (Required)
The first few letters on the first line will appear in the list of notes.
-
You can add files related to the note.
Click the button to open Attachment File window and select files you need.
-
After saving the note, its new Sticky Note item will be recorded automatically with the color you choose here.
For more information, see Sticky Note section.
When all, including the setting of attachment files, done, click "Create" and save the data.
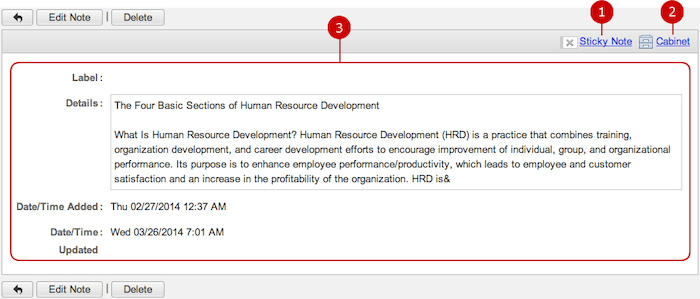
To See the Details of a Note
Click the link of a note in the list and go to Note screen.
This chapter will shows you how to edit a notepad.
-
You can add a new Sticky Note item of the note by setting Sticky Note color here.
For more information, see Sticky Note section.
-
You can add a new cabinet item of the note by clicking "Cabinet" here.
For more information, see Cabinet section.
-
Here you can see the details of the note.
To Edit a Note
Click "Edit Note" on the Note screen and go to Edit Note screen.
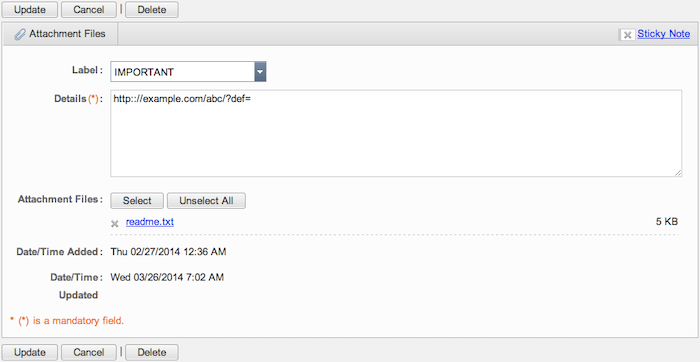
You can edit anything you did when created.
To deselect an attachment file, click "x" before the file name.
When the setup is complete, press "Update" button to save the data.
* Data/Time Added is when the note was created. It remains even after updated. The last updated date and time is recorded in Date/Time Updated.
To Delete a Note
On Main, Note, or Edit Note screen, click "Delete" and Confirmation dialog will appear.
The note will be deleted right after clicking "Yes". The note will be permanently deleted and cannot be recovered. Please take note.
To Manage Labels
You can add, edit, and delete labels in the list of labels area on Main screen.
-
Add Label creates a new label.
Click the button to open Add Label window. Enter a label name and save.
(If a name of a label is too long, the name may be clipped)
-
Edit Label edits a label.
Click the button to open Edit Label window. Edit the label name and save.
-
Delete Label deletes a label.
Click the button and Confirmation dialog will appear.
The label will be deleted right after clicking "Yes" and will be classified into "Notes without Label" .
- To Apply a Label to a Note
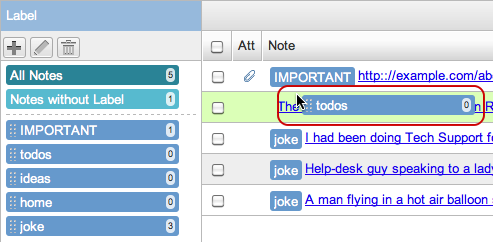
* To apply a label to a note, hold the label and move it upon the note item. The new label will be set.
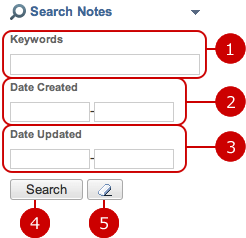
To Search Notes
The option area of Side Pane has the Search Notes feature.
You can find notes by entering the a keyword, Date Created, and Date Updated.
-
The search finds notes which contain the words you typed in Keyword box.
* Separate words with spaces to specify multiple keywords.
-
You can specify range of Date Created.
When you click an entry field, a calendar will be displayed. Click a date on the calendar, and it will be set to the field.
* Enter a date in MM/dd/yyyy format, numeric.
-
Specify the period of update date.
When you click an entry field, a calendar will be displayed. Click a date on the calendar, and it will be set to the field.
* Enter a date in MM/dd/yyyy format, numeric.
-
Click "Search" and you will see the list of results.
-
When you press [
 ] button, all search conditions are cleared.
Copyright (C) 2012-2016 NEOJAPAN Inc. All Rights Reserved.
