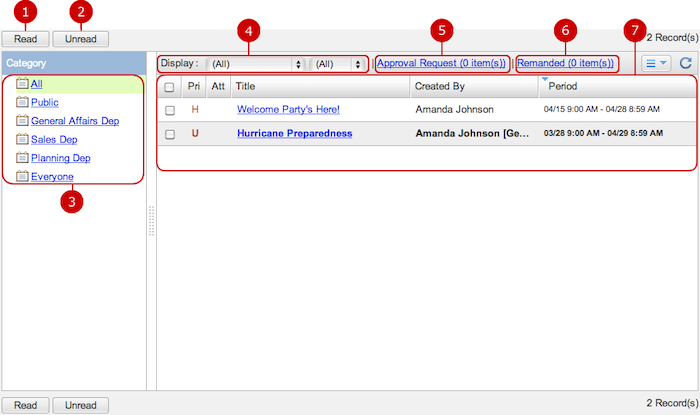
To Display Information Messages
Categories to categorize information messages and messages in each category are displayed.
* If number of messages to be displayed exceeds 5,000, more than 5,000 messages are not displayed.
* There are two types of list screens available: the list for browsing and editing screen.
- The List for Browsing
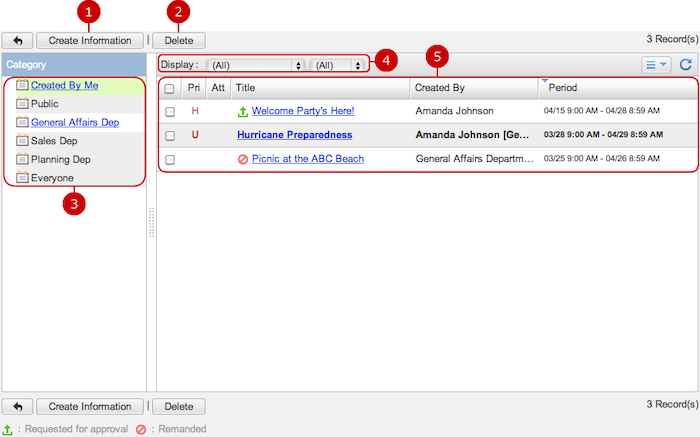
- The List for Editing
* When you press the link of Edit Information in Settings menu, Edit Information screen is displayed.
-
Create an information message.
* You can create a message in the category which you have "Read" access right.
-
Delete information messages.
When you select information messages you want to delete and press "Delete" button, a delete confirmation window is displayed.
When you press "Yes" in the delete confirmation windows, the information messages are deleted.
* Users who can delete information messages are as follows.
- Users who created the information message
- Users who have "Delete" right to the all categories of information messages.
-
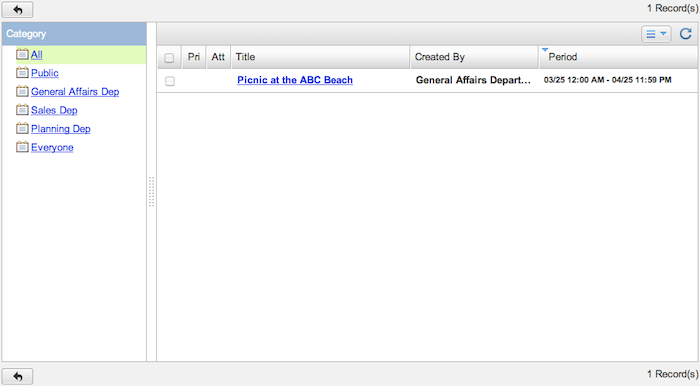
Categories to categorize information messages are displayed.
When you press a link of the category, information messages categorized in the category are displayed.
When you press "Created By Me", information messages you created are displayed.
* You can choose categories to which you have any one of "Add", "Edit", "Delete" access right. (Categories you cannot choose are displayed in gray background)
-
Display information messages that match the conditions (Narrow down)
Narrow down by display period... Choose one from "Before Posting", "Being Posted", "Closed", or (All).
Narrow down by read status... Choose one from "Unread","Read", or (All).
-
The list of information messages is displayed.
When you press a link of the Title, Details of Information (for editing) screen is displayed.
* Unread information messages are displayed in bold.
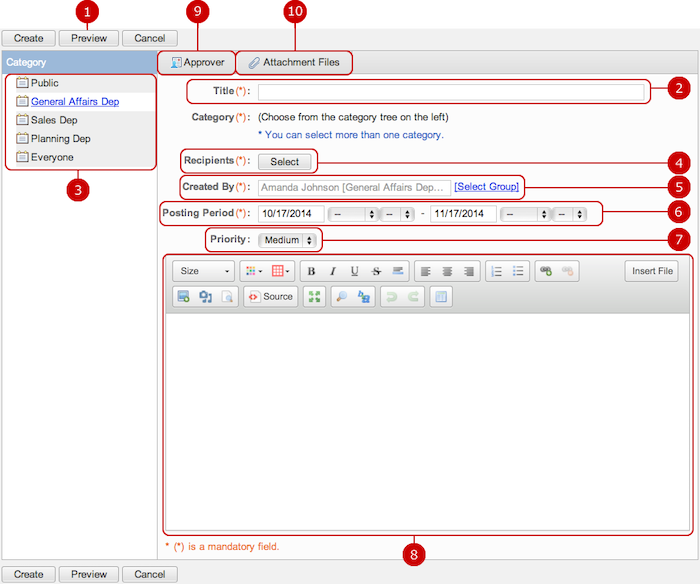
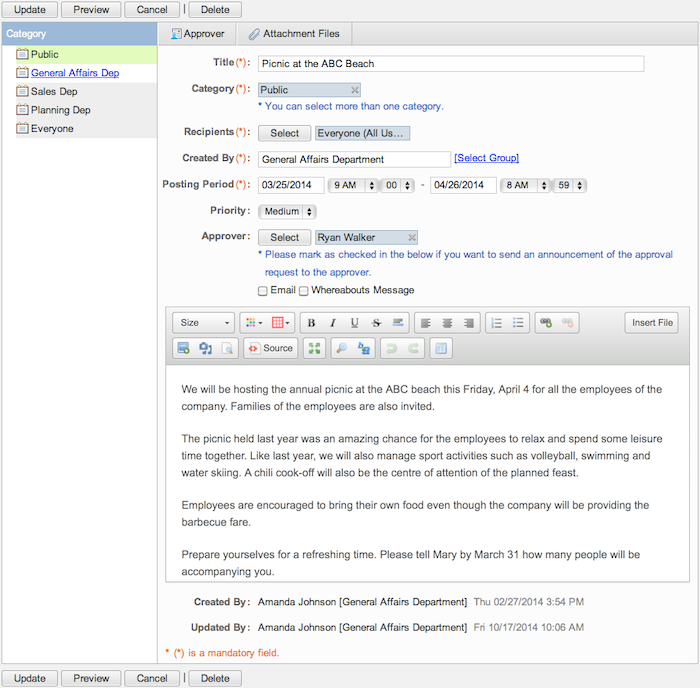
To Create Information Message
When you press "Create Information" button, Create Information screen is displayed.
* "Create Information" button is in the list for editing screen.
* You can create information messages in the categories which you have "Add" right.
-
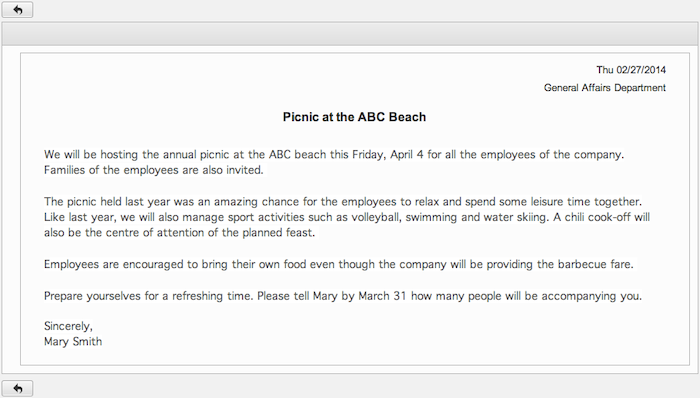
Display the information message being created in a preview screen.
-
Enter a title.
-
Select categories to categorize the information message.
Select categories in the list on the left (You can select more than one category).
When you select categories, users, groups and roles which are set in the categories are set as recipients automatically.
* Categories you do not have "Add" access right cannot be selected. (They are displayed in gray background)
-
Select recipients.
When you press "Select" button, the selection of user/group/role window is displayed.
(Please refer to the explanation of the user/group/role selection in the user's manual for more details.)
-
Enter an originator (Created By).
You can enter the information as an originator freely.
If you do not enter the field, your name and belonging group are set as an originator.
You can also choose a group in the group selection window which is displayed when you press the link of "Select Group".
-
Enter a posting period.
When you click an entry field, a calendar will be displayed. Click a date from the calendar to set the date in the text box.
You can set the posting period more finely by setting the time.
* Enter a date in MM/dd/yyyy format, numeric.
-
Choose a priority.
Choose any one of "Urgent", "High", "Ordinary", "Low".
-
Enter the descriptions.
You can use text decoration and images freely.
(Please refer to the explanation of the rich text editor for more details.)
-
You can select approvers for the information message.
Click the button to open an approver selection window. Select a file.
* Information messages with approvers will not be made public until they have been approved.
-
You can attach files.
When you press the button, file selection window is displayed. Choose files you want to attach.
When the entry is complete, press "Create" button to save the data.
- Preview Screen
When you press "Preview" button, you can view how the message being entered is displayed.
- To Select Approvers
Clicking [Approver] button, an approver selection window will open.
When approvers have been selected, the approver field appears on screen.

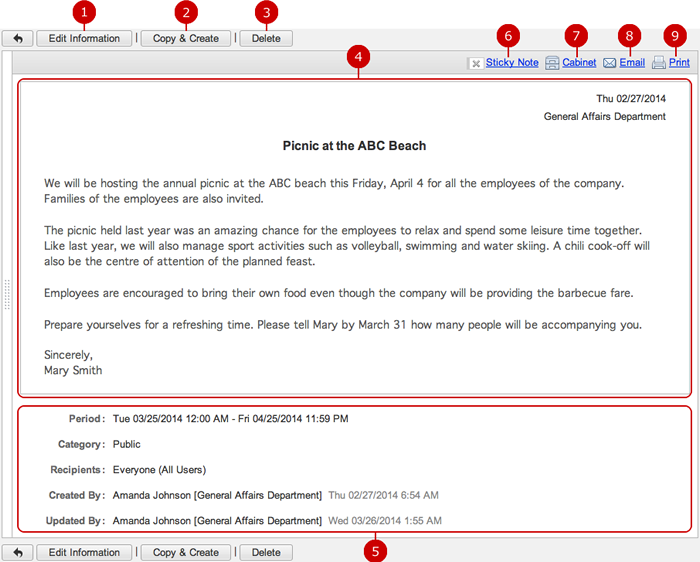
To Open Information Message
When you press a link of the Title, Details of Information screen is displayed.
-
Display Edit Information screen.
* The button is not displayed in Details of Information (for browsing).
* It does not appear on information messages that are being requested for approvals, or have been already approved.
* In the case of an information message which has been created by other users, the button is displayed if you have "Update" right to all the categories that are set to the information message.
-
Display Create Information screen with the same content of the information message being displayed.
* "Copy & Create" button is not displayed in Details of Information (for browsing) screen.
* In Details of Information (for editing) screen, if you do not have "Add" right to any categories of an information message, "Copy & Create" button is not displayed.
-
Delete an information message.
* This button is not displayed in Details of Information (for browsing) screen.
* In the case of an information message which has been created by other users, the button is displayed if you have "Delete" right to all the categories that are set to the information message.
-
The content of the information message is displayed.
If the priority is set to other than "Ordinary", the symbol of the priority is displayed before the title.
-
The details of Information is displayed.
* Recipients filed is displayed if "Recipients" Field on Details Screen option is set to "Display" in "System Management" - "General Settings".
-
When you press Sticky note button, you can copy the information to a Sticky note.
Please refer to the explanation of Sticky note for more details.
-
When you press Cabinet button, you can copy the information to a file in Cabinet.
The following contents will be added to Cabinet.
- "Title" of an information will be added to "Title".
- Contents of an information.
- Added files in an information will be added to "Attachment Files".
Please refer to the explanation of Cabinet for more details.
-
Compose new mail screen is displayed in a new window.
The following information will be automatically filled in a compose mail screen.
- "Title" of an information will be added to "Subject".
- "Contents" of an information will be added to "Body".
- Added files in an information will be added to "Attachment Files".
* Compose mail screen is displayed in a text format.
* Email composing screen is depends on the settings set up in Personal Settings > Design Settings.
Please refer to the explanation of WebMail and WebMail IMAP application in the user's manual for more details.
-
When you click the print link, a printable view is opened in a new window.
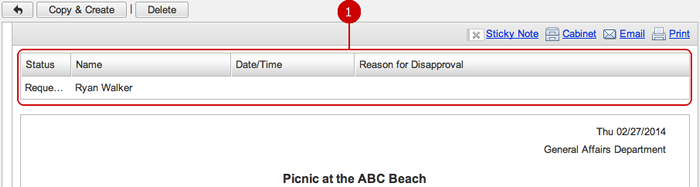
- Being Requested for Approval
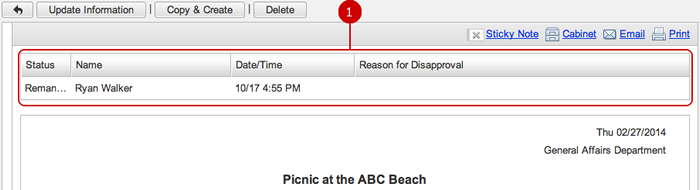
- Remanded Information Messages
-
Here is the current situation.
Reasons for disapproving are written if they exist.
If an information message has been disapproved, the applicant should edit the contents and he/she will be able to request for approval again.
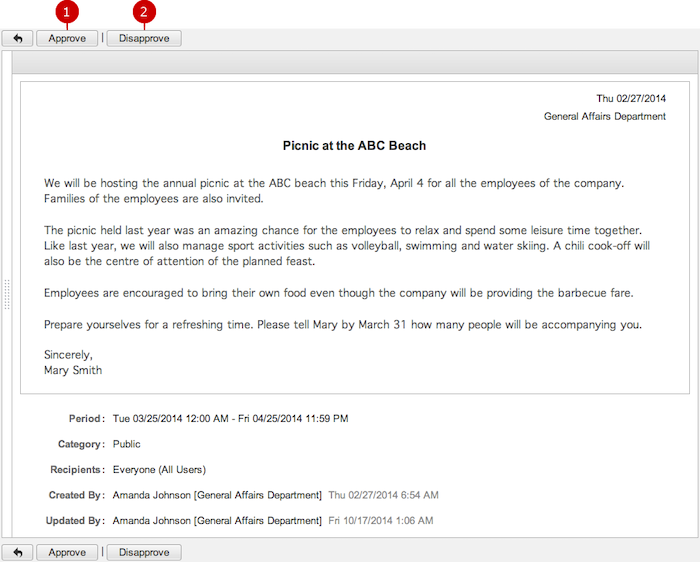
To Confirm Approval Requests
On the top page, a link shows a number of information massages where the user has assigned to as an approver.
Click the link and see the list of approval requests.
Here is the list of information massages where the user has assigned to as an approver.
Click a link to see the details.
- Details of Information of Request Approval
-
Approves the information massage.
Clicking [Approve] button, a confirmation window will appear.
Approved information will be made public to the target users.
-
Disapproves the information massage.
Clicking [Disapprove] button, a confirmation window will appear.
Enter a reason, and it will be remanded to the applicant.
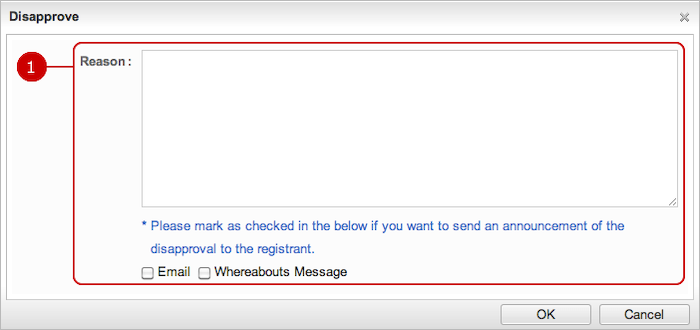
- Disapprove Window
-
Enter a reason of disapproving.
Select a way to inform the applicant.
Click [OK] to submit the disapproving.
To Edit Information Message
When you press "Edit Information" button in Details of Information (for editing) screen, Edit Information screen is displayed.
* In the case of an information message which has been created by other users, you have to have "Update" right to all the categories that are set to the information message.
* If you want to add or delete a category in the edit screen, you have to have "Add", "Delete" right respectively to the category.
You can change any information of the information message.
When changes are complete, press "Update" button to save the data.
To Delete Information Message
When you press "Delete" button on the list of information messages, Details of Information or Edit Information screen, a confirmation window is displayed.
When you press "Yes" button, the information messages are deleted.
* Users who can delete information messages are as follows.
- Users who created the information message
- Users who have "Delete" right to the all categories of information messages.
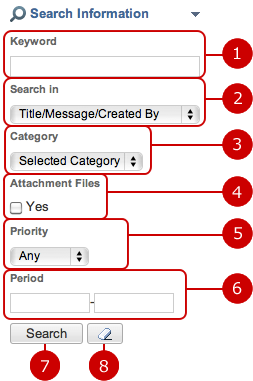
To Search Information Messages
When you open the menu on the left side of screen, the information search function appears.
You can find information messages by entering the various conditions, such as keyword, category, With/Without Attachment Files.
* If number of messages found exceeds 5,000, more than 5,000 messages are not displayed. Please add or edit the search conditions to narrow down.
-
Enter keywords.
The search function searches in the fields specified in "Searched in" by keywords.
* If you want to specify more than one keyword, use space to separate keywords.
-
Choose where to be searched by the keywords.
-
Choose a category to be searched.
The search function searches information messages that the category you selected is set.
-
The search function searches information messages file(s) attached.
-
Choose priority.
The search function searches information messages that the priority you selected is set.
-
Specify the period to be searched.
When you click an entry field, a calendar will be displayed. Click a date on the calendar, and it will be set to the field.
* Enter a date in MM/dd/yyyy format, numeric.
-
When you press "Search" button, information messages that match the search conditions are displayed in the list screen.
-
When you press [
 ] button, all search conditions are cleared.
Copyright (C) 2012-2016 NEOJAPAN Inc. All Rights Reserved.
