To Set Workflow Steps
When you press the link of Application Form Management > Workflow Steps Settings in Settings menu, Workflow Steps Settings is displayed.
You can add, edit, and delete workflow steps which are used when creating applications.
The workflow steps created in Workflow Steps Settings can be used by any user.
* If access rights are set to workflow steps, users, groups, roles that have access rights can use the workflow steps.
-
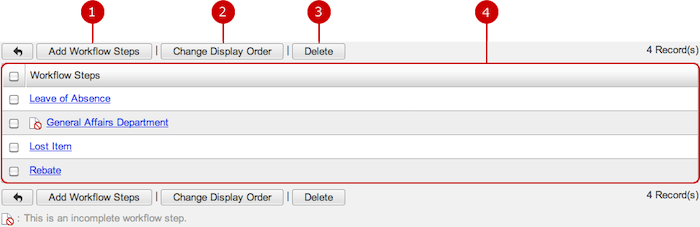
Add workflow steps.
-
Change the display order of workflow steps you selected.
Choose recipients on the list and then press "Change Display Order" button to switch the screen mode to Change Display Order mode.
In Change Display Order mode, choose the destination of the workflow steps. You can move more than one workflow step at one time.
* Press and hold down the mouse button over the data you want to move and move the mouse and release the mouse button on desired place to change the display order.
-
Delete workflow steps.
Select workflow steps you want to delete and press this button to delete them. You can select more than one workflow step.
-
The list of workflow steps is displayed.
When you press a link of Workflow Steps, Edit Workflow Steps screen is displayed.
When you press a link of Workflow Steps, Edit Workflow Steps screen is displayed.
To Add Workflow Steps
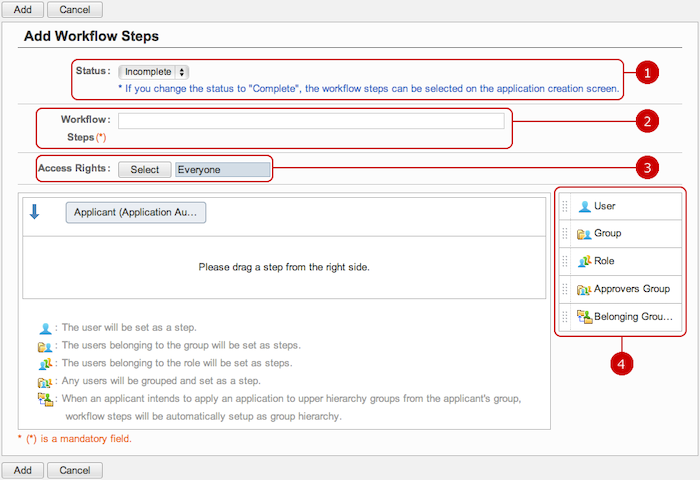
When you press "Add Workflow Steps" in the list of workflow steps screen, Add Workflow Steps screen is displayed.
-
Change the status of the workflow steps.
If you change the status to "Complete", the workflow step can be selected on the creation screen.
-
Enter a name of the workflow steps.
-
Select users, groups, roles that can use the workflow steps.
When you press "Select" button, Set Access Rights window is displayed.
-
Set workflow steps.
Workflow steps can be combination of users, groups, roles, approval groups, belonging group hierarchies.
Please refer to To Create Workflow Step in the user's manual for creating workflow steps.
When the entry is complete, press "Add" button to save the data.
To Edit Workflow Steps
When you press a link of Workflow Steps, Edit Workflow Steps screen is displayed.
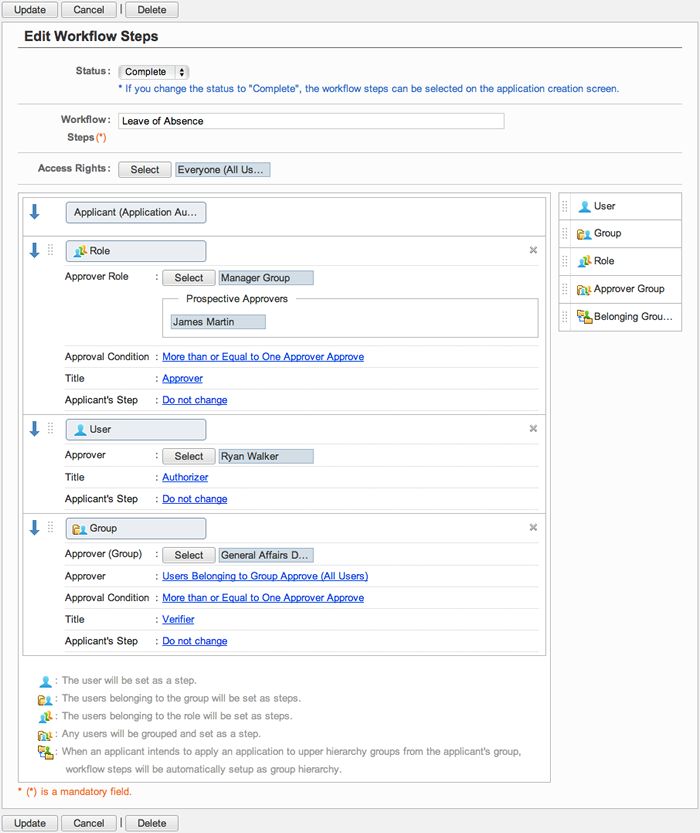
When changes are complete, press "Update" button to save the data.
To Delete Workflow Steps
When you press "Delete" button file in the list of workflow steps or Edit Workflow Steps screen, a confirmation window is displayed.
When you press "Yes" button, the workflow steps are deleted. The workflow steps are permanently deleted and cannot be recovered. Please take note.
To Set Application Forms
When you press the link of Application Form Management > Application Form (Title/Form/Steps) Settings in Settings menu, Application Form Settings is displayed.
You can add, edit, and delete forms consisting of title, form, and workflow steps.
The application forms created in Application Form Settings can be used by any user.
* If access rights are set to an application form, users, groups, roles that have access rights can use the application for
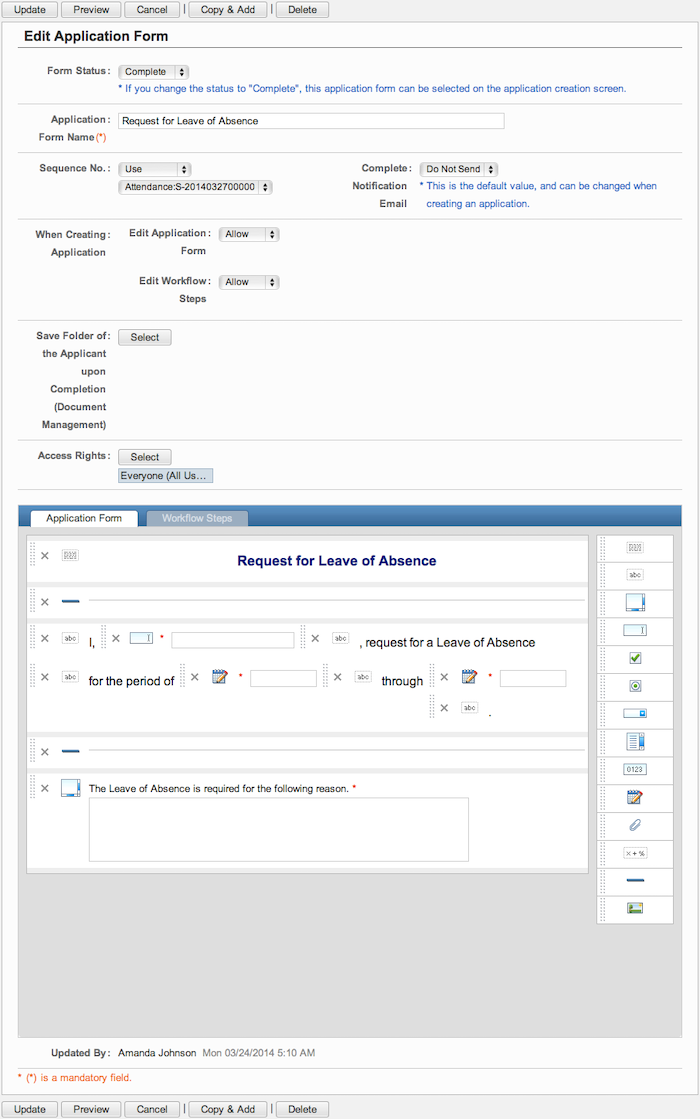
To Add Application Form
When you press "Add Application Form" button in the list of application forms, Add Application Form screen is displayed.

-
Change the status of the application form.
If you change the status to "Complete", this application form can be selected on the creation screen.
-
Enter a name of the application form.
-
Choose whether to use a sequence No. when using the form.
If you choose "Use", choices of sequence No. are displayed.
The sequence No. you selected is automatically issued.
-
Choose whether to send a notification email when an application is complete.
* This setting can be changed by individual user.
-
Choose whether to allow users to edit the content.
If you choose "Allow" in Edit Application Form, applicants can edit the form content.
If you choose "Allow" in Edit Workflow Steps, applicants can edit the workflow steps.
* If the form and workflow steps are not set and "Disallow" is set to this option, an application based on the form cannot be applied. Please take note.
-
Choose a folder to save complete applications in Document Management.
You can save applications in a folder automatically when the applications completed.
When you press "Select" button, a window to select a folder in Document Management is displayed.
* If the system administrator sets to not save applications, this option is not displayed.
-
Set access rights of the application form.
Select users, groups, and roles that can use the application form.
-
Switch between Application Form and Workflow Steps view.
-
Edit the form.
You can edit the form using any combination of controls such as text, check boxes, and radio buttons.
(Please refer to the explanation of Form Settings for more details)
- Edit Workflow Step View
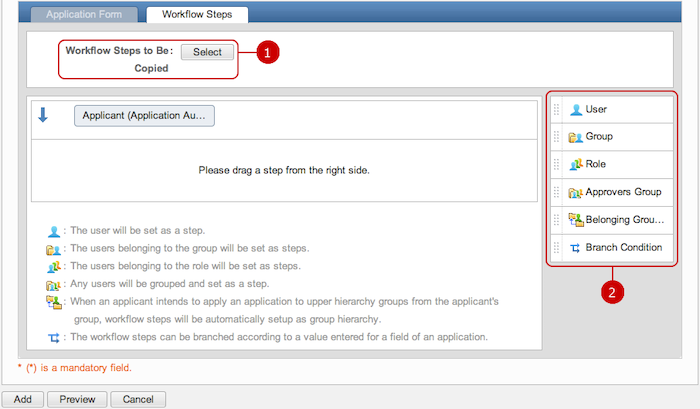
-
Choose workflow steps to copy the settings.
When you press "Select" button, Select Steps window is displayed.
-
Set workflow steps.
Workflow steps can be combination of users, groups, roles, approval groups, belonging group hierarchies, branch condition.
Please refer to To Create Workflow Step in the user's manual for creating workflow steps.
When the entry is complete, press "Add" button to save the data.
To Edit Application Form
When you press a link of Application Form Name, Edit Application Form screen is displayed.
* A warning message appears on the top of the screen, if the specified folder of Document Management, in which your applications are supposed to be stored, has been deleted. Please confirm the settings of the storage folder.
When changes are complete, press "Update" button to save the data.
To Delete Application Forms
When you press "Delete" button on the list of application forms or Edit Application Form screen, a confirmation window is displayed.
When you press "Yes" button, the application forms are deleted. The applications are permanently deleted and cannot be recovered. Please take note.
To Add Form from File (Import)
When you press the link of Application Form Management > Import Form in Settings menu, Import Form screen is displayed.
You can add a form by importing a file.
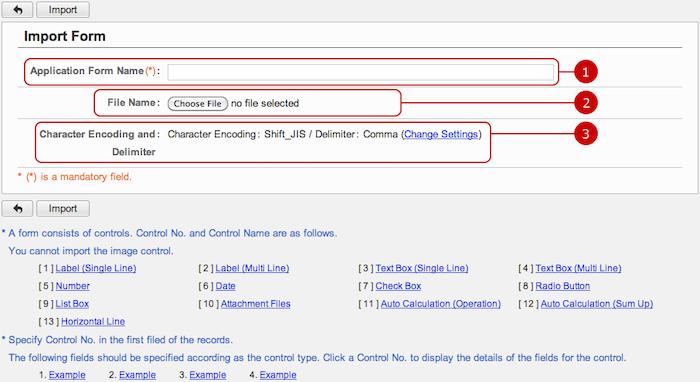
-
Enter a name of the application form.
-
Choose a file.
-
Choose a character encoding and delimiter of the file.
Press Change Settings link to change the character encoding and delimiter options.

After all entries are completed, when you press "Import" button, importing a form is started.
To Save Form to File (Export)
When you press the link of Application Form Management > Export Form in Settings menu, Export Form screen is displayed.
You can save a form to a file.
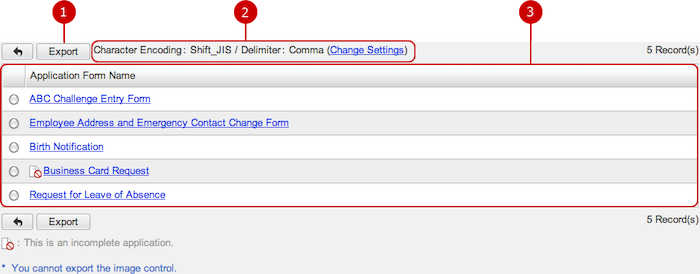
-
When you choose a form and press "Export" button, exporting the form is started.
-
Choose a character encoding and delimiter used in the file.
Press Change Settings link to change the character encoding and delimiter options.

-
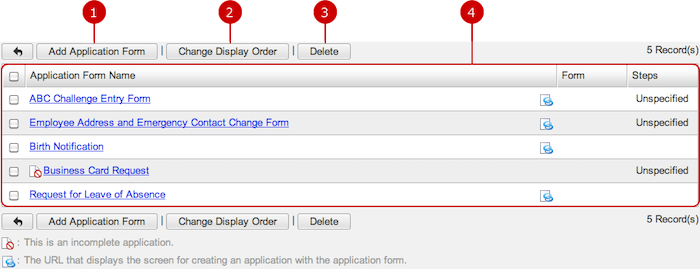
The list of application forms is displayed.
When you press a link of Application Form Name, a preview window is displayed.
The incomplete icon is displayed beside of incomplete application forms.
Copyright (C) 2012-2016 NEOJAPAN Inc. All Rights Reserved.
