To Set Display Settings of Workflow
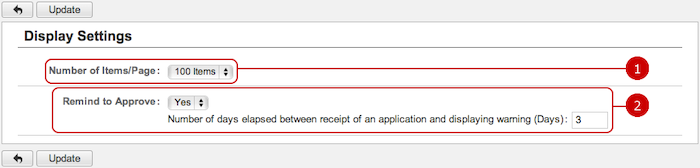
When you press the link of Display Settings in Settings menu, Display Settings screen is displayed.
-
Choose how many items are displayed per page.
-
Choose whether to display a warning stagnant application.
If you choose "Yes", enter number of days remaining until the warning display.
When the number of days remaining is less than the days you entered, Elapsed filed is displayed in red.
When the entry is complete, press "Update" button to save the data.
To Set Workflow Steps
When you press the link of Personal Setting > Application Settings > Workflow Steps Settings in Settings menu, Workflow Steps Settings screen is displayed.
You can add, edit, and delete workflow steps which are used when creating applications.
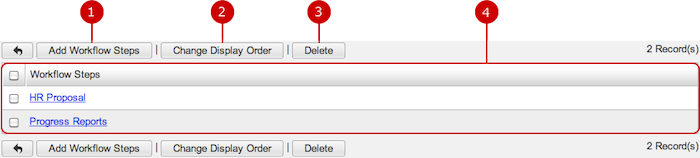
To Add Workflow Steps
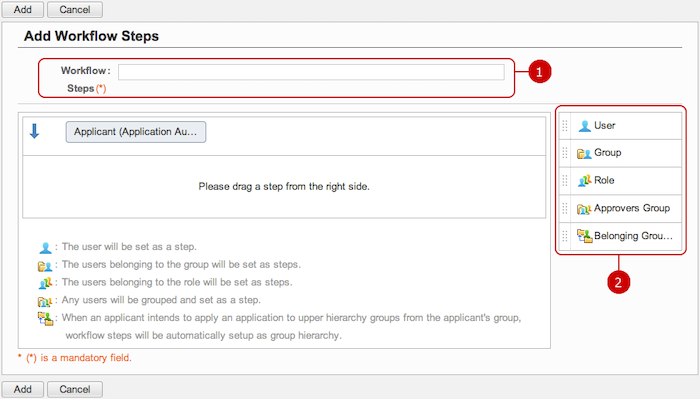
When you press "Add Workflow Steps" in the list of workflow steps screen, Add Workflow Steps screen is displayed.
-
Enter a name of the workflow steps.
-
Set workflow steps.
Workflow steps can be combination of users, groups, roles, approval groups, belonging group hierarchies.
Please refer to To Create Workflow Step in the user's manual for creating workflow steps.
When the entry is complete, press "Add" button to save the data.
To Edit Workflow Steps
When you press a link of Workflow Steps, Edit Workflow Steps screen is displayed.
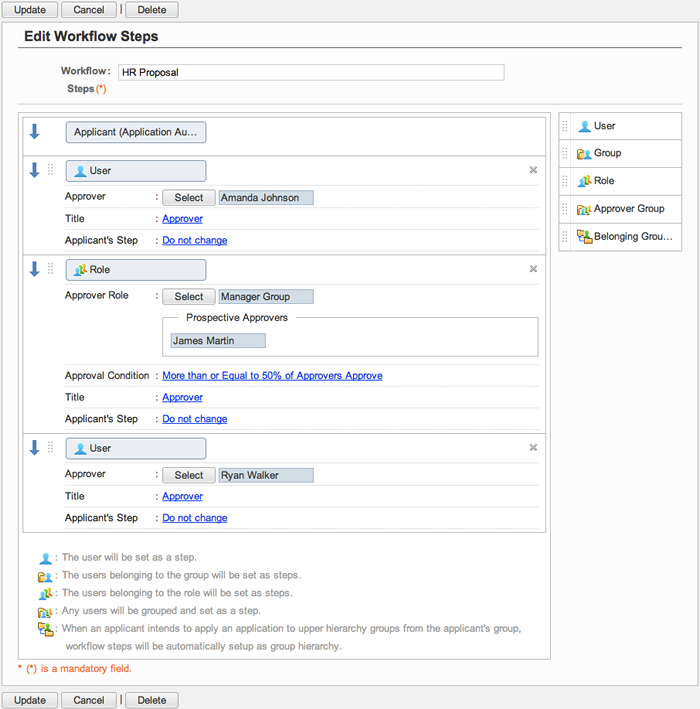
When changes are complete, press "Update" button to save the data.
To Delete Workflow Steps
When you press "Delete" button file in the list of workflow steps or Edit Workflow Steps screen, a confirmation window is displayed.
When you press "Yes" button, the workflow steps are deleted. The workflows are permanently deleted and cannot be recovered. Please take note.
To Set Application Forms
When you press the link of Personal Setting > Application Settings > Application Form Settings in Settings menu, Application Form Settings screen is displayed.
You can add, edit, and delete application forms consisting of title, form, workflow steps.
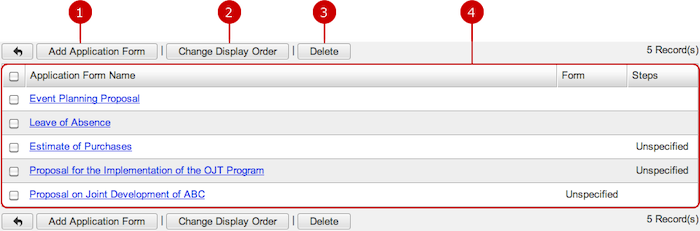
To Add Application Form
When you press "Add Application Form" button in the list of application forms, Add Application Form screen is displayed.

-
Enter a name of the application form.
-
Switch between Application Form and Workflow Steps view.
-
Edit the form.
You can edit the form using any combination of controls such as text, check boxes, and radio buttons
(Please refer to the explanation of Form Settings for more details)
- Workflow Steps View
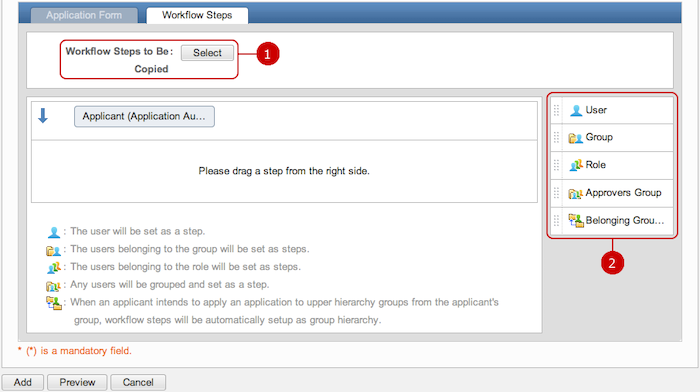
-
Choose workflow steps to copy the settings.
When you press "Select" button, Select Steps window is displayed.
-
Set the workflow steps.
Workflow steps can be combination of users, groups, roles, approval groups, belonging group hierarchies.
Please refer to To Create Workflow Step in user's manual for creating workflow steps.
When the entry is complete, press "Add" button to save the data.
To Edit Application Form
When you press a link of Application Form Name, Edit Application Form screen is displayed.
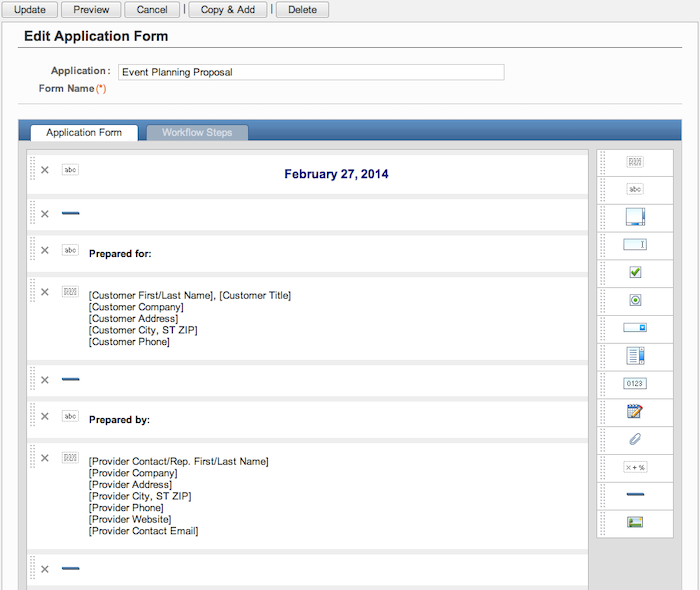
When changes are complete, press "Update" button to save the data.
To Delete Application Forms
When you press "Delete" button on the list of application forms or Edit Application Form screen, a confirmation window is displayed.
When you press "Yes" button, the application forms are deleted. The applications are permanently deleted and cannot be recovered. Please take note.
To Add Form from File (Import)
When you press the link of Personal Setting > Application Settings > Import Form in Settings menu, Import Form screen is displayed.
You can add a form by importing a file.

-
Enter a name of the application form.
-
Choose a file.
-
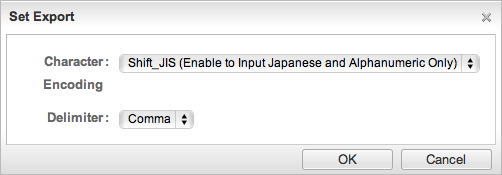
Choose a character encoding and delimiter of the file.
Press Change Settings link to change the character encoding and delimiter options.

After all entries are completed, when you press "Import" button, importing a form is started.
To Save Form to File (Export)
When you press the link of Personal Setting > Application Settings > Export Form in Settings menu, Export Form screen is displayed.
You can save a form to a file.
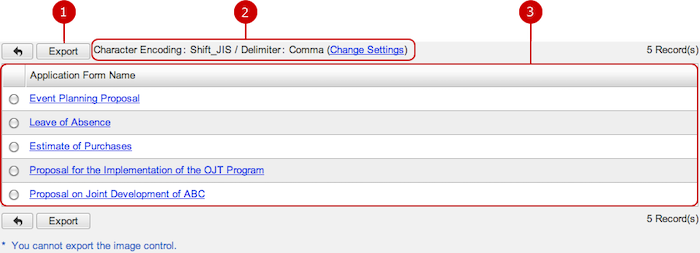
-
When you choose a form and press "Export" button, exporting the form is started.
-
Choose a character encoding to be used in the file.
Press Change Settings link to change the character encoding and delimiter options.
-
The list of application forms is displayed.
When you press a link of Application Form Name, preview window for the form is displayed.
To Set Absence Assistant
When you press the link of Absence Assistant Settings in Settings menu, Absence Assistant Settings screen is displayed.
You can set the absence assistant function if you are absence and cannot check applications.

-
Choose the process when you absence.
-
No Assistant ... Nothing to do.
-
Delegate the Approval to Other User ... The delegated user can approve applications coming to you.
-
Approve Automatically ... Applications coming to you will be approved automatically.
* If you are set as an approver in a group, a role, or a group hierarchy, automatic approving will not be executed.
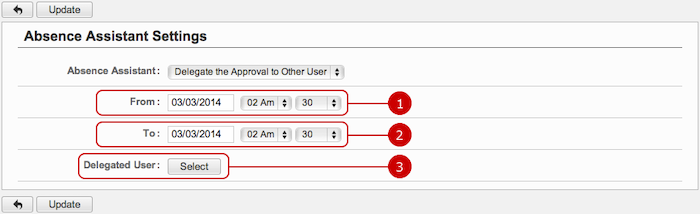
- Delegate the Approval to Other User
-
From
Specify a start date of the absence assistant.
-
To
Specify an end date of the absence assistant.
-
Select a user you want to delegate.
When you press "Select" button, User Selection window is displayed.
(Please refer to the explanation of the user/group/role selection in the user's manual for the user selection window.)
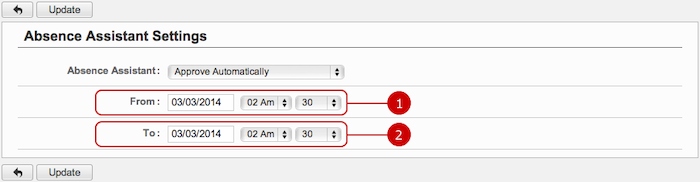
- Approve Automatically
-
From
Specify a start date of the absence assistant.
-
To
Specify an end date of the absence assistant.
When the entry is complete, press "Update" button to save the data.
To Set Notification upon Receipt
When you press the link of Notification upon Receipt in Settings menu, Notification upon Receipt screen is displayed
Choose whether to receive a notification upon receipt of a questionnaire.

-
Choose whether to receive a notification.
When the setup is complete, press "Update" button to save the data.
Copyright (C) 2012-2016 NEOJAPAN Inc. All Rights Reserved.
